I decided I needed a second fairy house. The new one would be more colorful. I looked at a lot of fairy houses on the internet and it seemed there was one thing about each of them that I liked. When I started to make it I couldn't find a way to incorporate all the things I wanted to put on it.
I think it turned out nice and the fairy that came to live in it thinks it is a fine house.
Friday, February 26, 2016
Wednesday, January 6, 2016
Fairy Houses
About a year and a half ago I was going to a polymer clay retreat where there would be a lot of demos. I always like to watch demos but the retreat was also to work on polymer clay things of my own. I needed a project that would take a long time but that I could work on in between demos. I decided on a fairy house. It would have a drinking glass as the base on which to add the clay. I pictured a tree trunk for my fairy to live in.
After I had covered the glass with varied shades of brown, cut a door and windows, I decorated the sides with flowers. I couldn't think of anything else to add, but Linda Farris was sitting across from me and she has made a lot of houses for miniatures. She suggested I add roots and a walk to the house. They made it look so much better. I added some stones to the walk also.
This past summer my daughter Robin and I signed up for some craft shows and holiday shows so I decided another fairy house would be a good thing to sell. This one needed to be different so I decided on brighter colors. I researched fairy houses and picked out different things I liked about each one I found. This time it was easier to make the fairy house. It didn't take nearly as long as the first one.
After I had covered the glass with varied shades of brown, cut a door and windows, I decorated the sides with flowers. I couldn't think of anything else to add, but Linda Farris was sitting across from me and she has made a lot of houses for miniatures. She suggested I add roots and a walk to the house. They made it look so much better. I added some stones to the walk also.
This past summer my daughter Robin and I signed up for some craft shows and holiday shows so I decided another fairy house would be a good thing to sell. This one needed to be different so I decided on brighter colors. I researched fairy houses and picked out different things I liked about each one I found. This time it was easier to make the fairy house. It didn't take nearly as long as the first one.
Friday, July 18, 2014
Christi Friesen Workshop
I recently attended a Christi Friesen Workshop in Columbiana OH. She is funny and very down-to-earth and gives classes around the world.
There were about 30 of us in the class. She demonstrated projects three times to groups of 10. I would try to get in the first group and then start making what was demonstrated. I would come to a point that I forgot the next step. By that time the third group was up front. I would stand behind the group listening then sit down and finish. I loved her teaching methods. I don't have to think my pieces have to be perfect - they are perfect however I finish them.
My favorite piece I made is the lion head. I put a pinback on him and love wearing it. Here a few of the pieces I made.
There were about 30 of us in the class. She demonstrated projects three times to groups of 10. I would try to get in the first group and then start making what was demonstrated. I would come to a point that I forgot the next step. By that time the third group was up front. I would stand behind the group listening then sit down and finish. I loved her teaching methods. I don't have to think my pieces have to be perfect - they are perfect however I finish them.
My favorite piece I made is the lion head. I put a pinback on him and love wearing it. Here a few of the pieces I made.
Tuesday, June 18, 2013
New Direction
Recently I decided to try some polymer clay pieces that weren't jewelry. I had made some light switch covers for our house, so decided to try some to sell in my Etsy store. Since I had made our great-grandsons light switches with the face of the moon and some stars I started with them. Then I got the idea to make a plain one with ruffled edges. I sold two of those. Then I made one with a cowboy hat and boot, one with Egyptian symbols and then one with frogs.
It's really fun making the different types. I hope other people like them as much as I do.
Tuesday, November 13, 2012
Poinsettia Pins
Monday, October 15, 2012
Out of My Comfort Zone
Some time ago Marla said on Creative Bead Chat that we should get out of our comfort zone now and then. I like my comfort zone which is making jewelry and wasn’t sure I wanted to go out of it. After that thought ran around in my head a few days I started to think what I could do that was different.
I had an old Carol Duvall tape where Becky Meverden made a cat. It looked so easy when Becky did it. She had a bunch of balls of clay all laid out and one by one she shaped them into: the body, the head, the arms, the legs, eyes, eyeballs, ears, mouth, puffy cheeks, etc. I thought maybe I could make a cat with a long tail that would serve as a ring holder. I watched the tape a few times and headed for my studio in the basement.
I started making a ball for the body. It seemed too small so I added some clay. When I rolled a ball for the head, it was too big, so I took some off and rolled again. That was the story with each ball I made - it was either too big or too small, and not just once but several times for each one. I wasn’t sure I was ever going to make another cat.
The next week a friend of mine saw my cat sitting on the shelf and just loved it. She said if I’d make more she would like to give them to her three friends - and one for herself, of course.
I can’t wait to get back in my comfort zone!
Wednesday, September 26, 2012
Pandora Style Beads
I just finished an order for 3 sets of large hole beads for a friend. She wanted 5 beads of black & white, pink and also torn watercolor blue.
The torn watercolor beads are made by rolling three colors together - always black and white then the color you want the beads to be. Then you tear off little strips and add them to a base bead. A little of the black and white show at the edge of the strip. It makes an attractive bead. I used a pearl blue for this set.
My friend saw my kitten ring holder and decided it would make a good gift for some friends so she ordered four of them. I hope these go faster than the first one did. I could never charge for the time that one took.
The torn watercolor beads are made by rolling three colors together - always black and white then the color you want the beads to be. Then you tear off little strips and add them to a base bead. A little of the black and white show at the edge of the strip. It makes an attractive bead. I used a pearl blue for this set.
My friend saw my kitten ring holder and decided it would make a good gift for some friends so she ordered four of them. I hope these go faster than the first one did. I could never charge for the time that one took.
Saturday, August 11, 2012
August
My friend Sally is making Kumihimo and was talking about how hard it is to get focal beads with a hole big enough to put all the cords through. I made her a couple samples out of scrap clay to try. The holes only have to be a little bigger than what I make in the Pandora style polymer clay beads. I'll probably make some more only making them a little better if she thinks they would suit.
I'm working on making a figurine of a cat. I have a dvd with a demo of making one. Hope I can make mine half as cute as theirs. I know I'll have to make a few of them so they look good.
Thursday, July 5, 2012
Summer Season
I've done two craft shows recently. One at York Township for Relay for Life and one at the Medina Fairgrounds for the Antique Tractor Show. I wanted something new for these shows so I covered some pens with polymer clay and made some bracelet helpers and covered them with polymer clay. The bracelet helpers are a tool that acts as a third hand when putting on a bracelet with a clasp that is hard to put on. I had fun trying different styles and techniques of polymer clay to cover the pens and the bracelet helpers.
I've entered the Polymer Clay Artists Guild of Etsy's monthly challenge the last two months. The last month was vessels and I put a bowl I had made in it. This month is using the extruder with polymer clay. I put a pendant I made that the extruder made little flower canes. I put slices from the canes on a sheet of black clay.
Wednesday, April 25, 2012
Out of My Comfort Zone
I decided to try something different than my usual pendants and beads. Christi Friesen had a tutorial at Fire Mountain of a peacock necklace. I decided just to make the peacock sitting on a limb as a pin. It doesn't look a lot like Christi's but for a first try, I like it.
Friday, January 27, 2012
Flowers
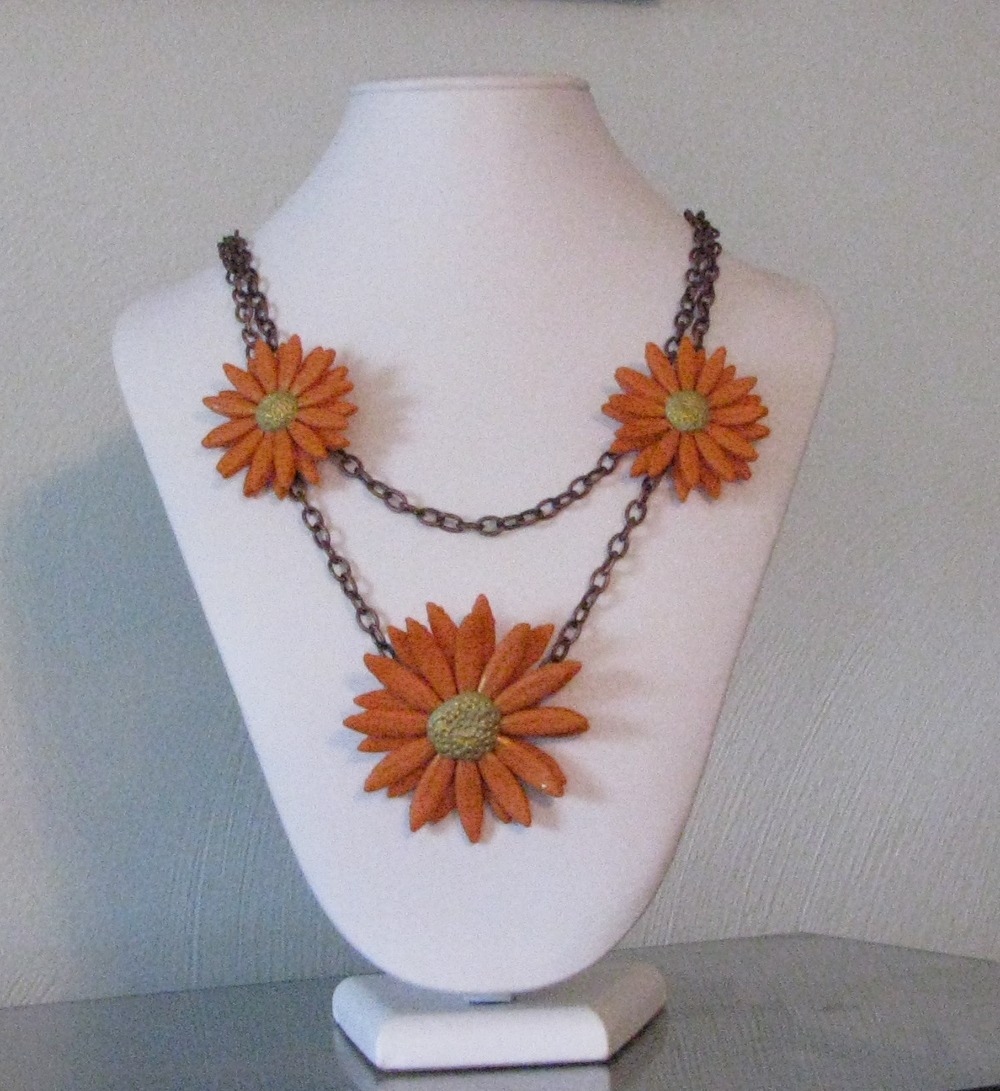
I've been making flowers with polymer clay and just love the results. I am donating the above necklace to the Salvation Army Spring Silent Auction.
Next I think I will make a sunflower if I can mix some clay to the right shade of dark yellow.
Tuesday, August 30, 2011
Bead Fest - King of Prussia
Recently I went with my daughter Robin to the Bead Fest in Philadelphia. We both took two classes, one the same and the other was different from each other's. The first class we took together was on cold connections and resin. We really wanted to learn more about cold connections but the teacher spent about 10 minutes on that and the rest of the afternoon on resin.
The second class I took was with Meredith Arnold on polymer clay. If I hadn't learned anything new it would have been an interesting day since I love working with polymer clay. We used pearl-ex, textures, glitter and other things to make the polymr clay more exciting. We made a bracelet of tiles with Buna cord pressed into each piece to mark the holes the beading wire would go through. I learned some things to NOT do the next time I make a bracelet like that.
After the classes, we shopped...and shopped. There are so many interesting booths to see and new techniques and products to see. We loved it!
The second class I took was with Meredith Arnold on polymer clay. If I hadn't learned anything new it would have been an interesting day since I love working with polymer clay. We used pearl-ex, textures, glitter and other things to make the polymr clay more exciting. We made a bracelet of tiles with Buna cord pressed into each piece to mark the holes the beading wire would go through. I learned some things to NOT do the next time I make a bracelet like that.
After the classes, we shopped...and shopped. There are so many interesting booths to see and new techniques and products to see. We loved it!
Wednesday, June 29, 2011
Red, White and Blue Jewelry
I made several pieces of the red, white and blue jewelry but Apropos weren't taking any new jewelry at this time. I put the pieces on Etsy.
Tuesday, May 31, 2011
Red, White and Blue Jewelry
I wanted to make some patriotic jewelry to take to Apropos where some of my pieces are for sale but I didn't get them finished in time. I'll just say they are made for July 4. I did finish one of them and decided it was for me. I wore it on Sunday and Monday (Memorial Day).
I'm looking forward to taking a class this Saturday in Columbus with Julie Picarello. I've admired her work for a long time. Robin got me her new book for Mother's Day. Really good book.
Monday, May 2, 2011
Easter
Saturday, January 1, 2011
After Christmas & New Year's Day
Last week I made a steampunk heart and a heart with the leftover black clay that had silver leaf crackled on it. I wanted to try doing the steampunk heart differently than I had in the past. I need to put the UV resin on it to see how successful it was. I need to buy a UV lamp to cure it because when I put a batch of pieces in the sun, half of them don't cure. They become contaminated I'm told. I hope I can find a lamp around here and not have to send online for one.
New Year's Day we went to Jenny and Bob's. Carly and Tony had gone to Sara and Josh's so there was only nine of us - Chris and Sheila and Austin, Nathaniel and Susie, Bob and Jenny, Clayt and I. The guys went out to the shed to shoot and Susie slept because she has had a bad cold for a couple of weeks and Bob gave her some peppermint schnapps that put her out. Jenny, Sheila and I played Skip Bo and Austin slept.
Friday, December 10, 2010
New Pieces on the Website
I've been putting some new pieces on the website. It has been a long time since I did that. That meant taking photos of some of them that were new. Robin has my light box and when the sun isn't out, I don't get very good pics.
I made a couple of Christmas ornaments for the tree. I covered glass ornaments with polymer clay. They both turned out differently than I had pictured them in my mind before I started.
Now I need to go into my studio and make something new.
I made a couple of Christmas ornaments for the tree. I covered glass ornaments with polymer clay. They both turned out differently than I had pictured them in my mind before I started.
Now I need to go into my studio and make something new.
Monday, November 15, 2010
Trunk Show
Saturday I did a trunk show at Apropos, a gift shop in Wadsworth. Sally, the owner, had a table set up for me with a black velvet cloth and a large lamp on either end. I thought the lamps would take up too much space and not leave enough room for my pieces, but the table was wide enough that I had plenty of room and the vases enhanced the layout. I only took the very best pieces, which I should do anytime I want to sell. I had four busts raised on two vases with a board between. On top of the board I had a lace edged table runner. I think it was a very nice layout.
About lunchtime Sally asked me if I'd like a cup of tea. That sounded great. I had been snacking on some raw nuts I had in my purse. When she brought the tea, she also had a slice of pumpkin roll on it. That's definitely not on my low sugar diet, but I savored every bite. Later she brought me another cup of tea with some chunks of cheese and said that there was a delicious dip and pretzels out front with the refreshments that would be good with the cheese.
I was surprised at how many people came in to shop the small store. Also, how long people stayed. Most were there for an hour or more. A few friends came in an boosted my sales and at the end of the day, Sally bought seven items.
It was a profitable and enjoyable day.
About lunchtime Sally asked me if I'd like a cup of tea. That sounded great. I had been snacking on some raw nuts I had in my purse. When she brought the tea, she also had a slice of pumpkin roll on it. That's definitely not on my low sugar diet, but I savored every bite. Later she brought me another cup of tea with some chunks of cheese and said that there was a delicious dip and pretzels out front with the refreshments that would be good with the cheese.
I was surprised at how many people came in to shop the small store. Also, how long people stayed. Most were there for an hour or more. A few friends came in an boosted my sales and at the end of the day, Sally bought seven items.
It was a profitable and enjoyable day.
Wednesday, October 27, 2010
UV Resin
I tried a new UV resin that you can cure outside in the sun or under a UV lamp. Some people use the lamps like beauticians use to dry nails. I just take mine outside when the sun is shining. Some days I just forget about doing it because the sun doesn't come out.
I see beautiful pieces that have resin coating on them and think it would be easy to do. I always get too much on and it drips over the side or I get too little on and there are spots without a nice glaze on them. It's hard to get a happy medium.
I had a couple of pendants I made using a mold from antique buttons. They are round and domed in the middle. The resin slid off the side and some got under the pendant. When the top was cured I turned it over to cure the resin that had sneaked there. I left it out longer than needed and still it didn't cure. It's still a little tacky. I'm going to have to go to the website of the makers and see if they can help me.
I see beautiful pieces that have resin coating on them and think it would be easy to do. I always get too much on and it drips over the side or I get too little on and there are spots without a nice glaze on them. It's hard to get a happy medium.
I had a couple of pendants I made using a mold from antique buttons. They are round and domed in the middle. The resin slid off the side and some got under the pendant. When the top was cured I turned it over to cure the resin that had sneaked there. I left it out longer than needed and still it didn't cure. It's still a little tacky. I'm going to have to go to the website of the makers and see if they can help me.
Tuesday, August 17, 2010
First Stained Glasslike pieces
I watched the tutorial on Cindy Lietz blog twice then decided to try her "blend and switch" polymer clay process. The first one I did was a mess. The clay stuck to the tile and the clay stuck to my acrylic roller. I finally gave up and made some beads out of the clay. They turned out gorgeous, so it wasn't a total loss.
The next time I tried it, I knew some things that I shouldn't do and some that I hadn't done before. I think the pieces came out exceptionally nice. I'm going to try it again using different colors.
Subscribe to:
Posts (Atom)